PDFKit is the framework by Apple that you need to display and manipulate PDF files in your app. PDF is useful so we can generate files that cannot be modified and shared or sent to others. This is especially useful for apps that need to generate receipts, bills, invoices or any other confidential or important documents.
To create PDF file with the PDFKit, all you need is instantiate the key class UIGraphicsPDFRenderer in PDFKit framework. To instantiate it, you need to specify its bounds and an optional parameter for its format, as follows:
let pdfMetaData = [kCGPDFContextCreator: "My First PDF File",
kCGPDFContextAuthor: "TechChee.com"]

let format = UIGraphicsPDFRendererFormat()
format.documentInfo = pdfMetaData as [String: Any]

let pageRect = CGRect(x:0, y:0, width: 500, height: 600)

let renderer = UIGraphicsPDFRenderer(bounds:pageRect , format: format)
You can then invoke the pdfData(actions:) of the renderer which provides you a block with the context that allows you to use drawing methods in CoreGraphics framework to start drawing texts or images etc, such as follows:
let data = renderer.pdfData{ context in
    context.beginPage() // call it when you need to start a new page

    // draw text with the specified font style
    let text = "My First PDF file"
    let attributes = [NSAttributedString.Key.font: UIFont.boldSystemFont(ofSize: 30)]
    text.draw(in : CGRect(x: 20, y: 30, width: 300, height: 50), withAttributes: attributes)

    // draw image
    if let image = UIImage(named: "techchee_logo"){
        image.draw(in: CGRect(x: 20, y : 100,
               width: image.size.width , height: image.size.height) )
    }
}
Please note that the above, you need to call context.beginPage() to start a new page. (Call it every time when you need to start a new page). More info on using the UIGraphicsPDFRenderer can be found on Apple Developer Documentation
The pdfData method returns a Data object which you can then create a PDFDocument and view it with the PDFView that comes with the PDFKit framework :
let pdfView = PDFView()
pdfView.autoScales = true // a Boolean value determining if autoscaling is set
pdfView.document = PDFDocument(data: data)
In UIKit, you can add the above pdfView as a subview in your ViewController.
Or in SwiftUI, you can have a UIViewRepresentable to wrap the PDFView and used in any of your View.
Let’s build a simple PDF composer app in SwiftUI with MVVM approach!
In this tutorial, we are going to look at how to do it with SwiftUI and create a simple PDF composer app in the MVVM manner. Please refer to our previous tutorial about MVVM, if you’re new to it.
The PDF composer simply presents a form as below for the user to enter the title and body text.
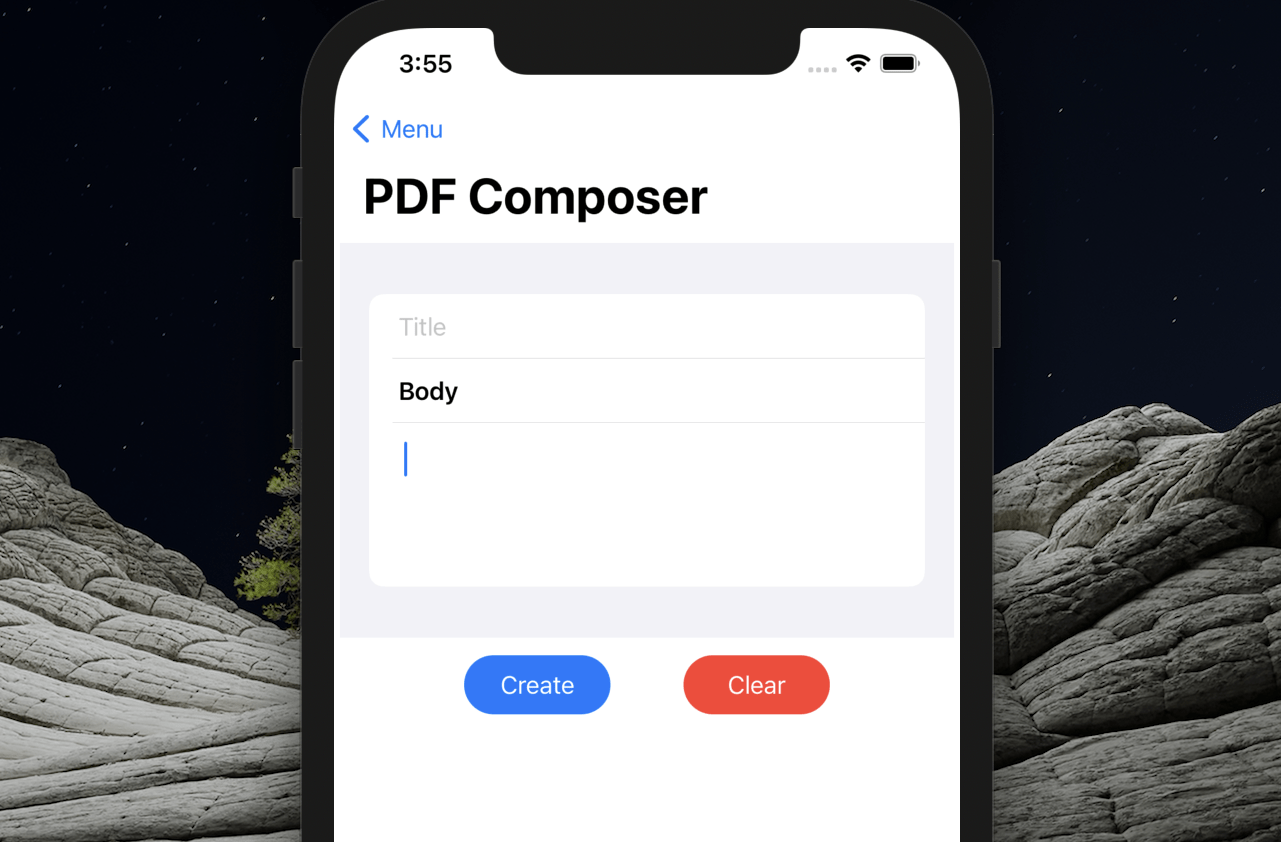
And it’ll create a simple PDF file which consists of the title and the body text only which can be shared, when the user presses the “create” button, as below:
Besides the PDFKit framework, what you’ll learn in this tutorial in SwiftUI are :
- Getting to know the data-entry controls such as TextField and TextEditor and Form container in SwiftUI.
- How to convert any built-in or existing custom UIView for SwiftUI by the use of UIViewRepresentable
- How to convert any built-in or existing custom UIViewController for SwiftUI by the use of UIViewControllerRepresentable
- Use MVVM design approach for building app in SwiftUI
- How to share your ViewModel across many views by the use of @EnvironmentObject property wrapper and injecting the ViewModel as an environment object by the View modifier environmentObject()
Let’s get started!
First of all, for simplicity, we create a PdfCreator class that is just good enough for this tutorial, which can create a PDF page with the title and body text only.
The PdfCreator class hides some boilerplate of using the PDFKit and Core Graphics frameworks to handle the creation of PDF data as below:
class PdfCreator : NSObject {
    private var pageRect : CGRect
    private var renderer : UIGraphicsPDFRenderer?

    /**
    W: 8.5 inches * 72 DPI = 612 points
    H: 11 inches * 72 DPI = 792 points
    A4 = [W x H] 595 x 842 points
    */
    init(pageRect : CGRect =
        CGRect(x: 0, y: 0, width: (8.5 * 72.0), height: (11 * 72.0))) {

        let format = UIGraphicsPDFRendererFormat()
        let metaData = [kCGPDFContextTitle: "It's a PDF!",
            kCGPDFContextAuthor: "TechChee"]

        format.documentInfo = metaData as [String: Any]
        self.pageRect = pageRect
        self.renderer = UIGraphicsPDFRenderer(bounds: self.pageRect,
                                             format: format)
        super.init()
    }
}
The PdfCreator class has an initializer which setups the bounds and the format of the PDF renderer. The bounds will be given a default width of 8.5 * 72 dpi and height of 11 * 72 dpi, which is the required size of an A4 paper.
And it has the following convenient methods to handle drawing the title and body text using CoreGraphics inside their own specified bounds and with their font and paragraph styles respectively :
extension PdfCreator {
    private func addTitle ( title  : String ){
        let textRect = CGRect(x: 20, y: 20,
                         width: pageRect.width - 40 ,height: 40)
        title.draw(in: textRect,
              withAttributes: [NSAttributedString.Key.font: UIFont.boldSystemFont(ofSize: 30)])
    }

    private func addBody (body : String) {
        let paragraphStyle = NSMutableParagraphStyle()
        paragraphStyle.alignment = .justified

        let attributes = [
            NSAttributedString.Key.font: UIFont.systemFont(ofSize: 20),
            NSAttributedString.Key.paragraphStyle: paragraphStyle,
            NSAttributedString.Key.foregroundColor : UIColor.gray
        ]

        let bodyRect = CGRect(x: 20, y: 70,
                              width: pageRect.width - 40 ,height: pageRect.height - 80)
        body.draw(in: bodyRect, withAttributes: attributes)
    }
}
And finally, we expose the the following pdfData(title: body:) method, which returns an optional Data object containing the PDF data.
extension PdfCreator {
    func pdfData( title : String, body: String ) -> Data? {
        if let renderer = self.renderer {

            let data = renderer.pdfData  { ctx in
                ctx.beginPage()
                addTitle(title: title)
                addBody(body: body)
            }
            return data
        }
        return nil
    }
}
Let’s create our Model, View Model and View for our PDF composer app!
The Model
struct Content{
    var title : String = ""
    var body : String = ""
}
We basically have one model here, which is a struct Content which has two String-typed properties – the title and the body.
For now, it’ just a model for holding data in the memory and nothing more than that. And it can be expanded for mapping to any local or remote datasource for persistency when there is a need in the future.
The View Model
class ContentViewModel : ObservableObject {
    @Published private var content = Content()

    var title : String {
        get { content.title }
        set (newTitle){
           content.title = newTitle
        }
    }

    var body : String {
       get { content.body }
       set (newBody){
           content.body = newBody
       }
    }
}
The ContentViewModel class conforms to the ObservableObject protocol. It basically is a wrapper of the model Content which has a @Published property wrapper. And it provides proxy properties for the model’s properties which each has both getter and setter.
The ContentViewModel will be the one exposed to the views and used by the views in SwiftUI to reflect the views’ states and receiving actions from the views to update the model etc.
And the ContentViewModel has the following method pdfData() which basically instantiates our PdfCreator class and invokes its pdfData(title: body:) to return an optional Data object.
extension ContentViewModel {
   func pdfData() -> Data? {
       return PdfCreator().pdfData(title : self.title,
                    body: self.body)
   }

   func clear(){
       self.title = ""
       self.body = ""
   }
}
And it also has a clear() method which basically sets the title and body to blank String, when the View receives user’s action to clear the title and body text.
The Views
We’ll need a number of views and child views in this tutorial. They are :
- ContentView – which presents a form for entering the title and body and buttons for proceeding to create the PDF file and clearing the title and body text respectively.
- PdfViewUI – wraps the PDFView in PDFKit by using UIViewRepresentable so we can use it as a SwiftUI view.
- ShareView – wraps the UIActivityViewController by UIViewControllerRepresentable, so we can present UIActivityViewController in SwiftUI to let the user share the generated PDF file.
- PdfPreviewView – this presents the user with the preview of the created PDF file and with a button to allow the user to share it.
The ContentView
The code for the ContentView is as follows:
struct ContentView: View {
    @EnvironmentObject private var contentViewModel : ContentViewModel

    var body: some View {

        NavigationView {
           VStack {
             form()
             buttons()
             Spacer()
          }
         .navigationTitle(Text("PDF Composer"))
       }
    }
}
The view model – ContentViewModel is given the @EnvironmentObject property wrapper instead of the @ObservedObject. The @EnvironmentObject is a smart way to share ObservableObject across many views in your app.
For cleaner code, we have the form() and buttons() functions, which are functions that return some View, to layout the form for data entry and the two buttons respectively.
extension ContentView {
    private func form() -> some View {
        Form {
            TextField("Title", text: $contentViewModel.title )

            Text("Body").font(.headline)

            TextEditor(text: $contentViewModel.body)
            .frame(height: 100)
        }
        .frame(height: 270)
        .padding(4)
    }
}
The above code simply uses Form in SwiftUI – which is a container to group data entry controls such as textfields, text editors, pickers and others.
In our example here, TextField is used for the editing of the content title and TextEditor for the editing of long-form text – the content body.
The title and the body properties of the contentViewModel are passed as Binding (with $ prefix) to the TextField and TextEditor. So any editing on the TextField and TextEditor will reflect the new values of the contentViewModel’s title and body properties respectively.
The buttons() function basically layouts the two buttons in a HStack, with the first button is a NavigationLink will push to PdfPreviewView and the second button will invoke the clear() method of the contentViewModel when tapped, as follows:
extension ContentView{
    private func buttons() -> some View {

        HStack(spacing : 50) {
            NavigationLink(destination : PdfPreviewView() ){
                Text("Create")
                .padding(10)
                .frame(width: 100)
                .background(Color.blue)
                .foregroundColor(.white)
                .cornerRadius(20)
            }

            Button(action: { contentViewModel.clear() }, label: {
                Text("Clear")
                .padding(10)
                .frame(width: 100)
                .background(Color.red)
                .foregroundColor(.white)
                .cornerRadius(20)
            })
        }
    }
}
The PdfViewUI
It will be the child view used in PdfPreviewView for displaying the created PDF data.
In order to display the PDF data in a view, we just make use of the the PDFView that is available in the PDFKit framework.
UIViewRepresentable is the way to wrap any built-in or custom view in UIKit for SwiftUI
Thus, the PdfViewUI simply wraps the PDFView by UIViewRepresentable, as follows:
import SwiftUI
import PDFKit

struct PdfViewUI : UIViewRepresentable {

    private var data: Data?

    private let autoScales : Bool

    init(data : Data?, autoScales : Bool = true ) {
        self.data = data
        self.autoScales = autoScales
    }

    func makeUIView(context: Context) -> PDFView {
        let pdfView = PDFView()

        pdfView.autoScales =  self.autoScales

        if let data = self.data {
            pdfView.document = PDFDocument(data: data)
        }

        return pdfView
    }

    func updateUIView(_ uiView: PDFView, context: Context) {
        // Empty
    }
}
Basically, in the above we only create a struct that conforms to the UIRepresentable protocol and name it PdfViewUI.
Please note that we must import PDFKit as we need to use the PDFView and PDFDocument from PDFKit framework.
To conform to the UIRepresentable we need to implement two methods – the makeUIView(context:) ane the updateUIView(_ uiView: context:).
The makeUIView is to return the required PDFView, thus we create and return a PDFView with PDFDocument with the provided PDF data.
The updateUIView will be called when there is a change of data that affects the PDFView. In our case, we do not need to implement anything in updateUIView since, the PDF data is provided at the initializer.
The initializer of the PdfViewUI takes an optional Data object and a boolean value of determining if auto scaling is required and is set to true by default.
The ShareView is required here and used in PdfPreviewView to present a sheet for sharing the created PDF file.
In UIKit, UIActivityViewController is the way to let users share text, images, strings, URLs and more from our apps.
An example code of sharing a string using UIActivityViewController is as follows. Basically, you just need to instantiate it and provide the parameter activityItems with an array of Any type.
let sharer = UIActivityViewController(activityItems: ["Hello world"],
     applicationActivities: nil)
present(sharer, animated:true)
To use UIActivityViewController in SwiftUI, we need to use UIViewControllerRepresentable to wrap it. This is the answer in SwiftUI to represent any built-in or custom view controller (any subclass of UIViewController) in UIKit.
So, we just make our struct ShareView to conform to the UIViewControllerRepresentable as follows:
struct ShareView: UIViewControllerRepresentable {
    let activityItems: [Any]
    let applicationActivities: [UIActivity]? = nil

    func makeUIViewController(context: UIViewControllerRepresentableContext<ShareView>) ->
        UIActivityViewController {
        return UIActivityViewController(activityItems: activityItems,
               applicationActivities: applicationActivities)
    }

    func updateUIViewController(_ uiViewController: UIActivityViewController,
               context: UIViewControllerRepresentableContext<ShareView>) {
        // empty
    }
}
There are only two methods to implement for the UIViewControllerRepresentable protocol.
The makeUIViewController(context:) method is to create the initial view controller. So. we instantiate and return the UIActvityViewController here and provide it with the activityItems and the optional applicationActivities.
The updateUIViewController is to update the view controller when there is any change of SwiftUI states. And we don’t need it in our case here.
The PdfPreviewView
The code for the PdfPreviewView is as follows:
struct PdfPreviewView  : View {
    @EnvironmentObject private var contentViewModel : ContentViewModel

    @State private var showShareSheet : Bool = false

    var body: some View {

        VStack {
            PdfViewUI(data: contentViewModel.pdfData())
            shareButton()
            Spacer()
        }
        .navigationTitle(Text("Your PDF"))
        .navigationBarTitleDisplayMode(.inline)
        .sheet(isPresented: $showShareSheet, content: {
            if let data = contentViewModel.pdfData() {
                ShareView(activityItems: [data])
            }
        })
    }
}
Basically, it presents a VStack with the PdfViewUI on top and a share button below it. The PdfViewUI’s data is provided by the contentViewModel.pdfData().
The contentViewModel is shared from other views by the use of @EnvironmentObject property wrapper.
The ShareView is presented as a sheet which is determined by the @State variable showShareSheet.
The shareButton() is a function that returns some View. It basically presents a button with rounded Text view and toggles the showShareSheet variable to present the ShareView when it’s tapped, as follows:
extension PdfPreviewView {
    private func shareButton() -> some View {

        Button(action: {
            self.showShareSheet.toggle()
        }, label: {
            Text("Share")
            .padding(10)
            .frame(width: 100)
            .background(Color.blue)
            .foregroundColor(.white)
            .cornerRadius(20)
        })
    }
}
The environmentObject() modifier to inject the contentViewModel into SwiftUI environment
Last but not least, since the contentViewModel is shared as an EnvironmentObject in ContentView and PdfPreviewView, we need to have somewhere before them to create the contentViewModel and inject it into the environment of SwiftUI.
SwiftUI View comes with the built-in modifier environmentObject(), which lets you inject the environment object into SwiftUI’s environment.
In our case here, since ContentView and PdfPreviewView both use the view model as an environment object, we can inject it in our app entry point – the @main as follows:
import SwiftUI
@main struct SwiftUIPdfApp: App {
    var body: some Scene {
        WindowGroup {
            ContentView()
            .environmentObject(ContentViewModel())
        }
    }
}
Or alternatively, you can also inject the contentViewModel in the ContentView, which is the entry point of the navigation.
Therefore, instead of using the ContentViewModel as an EnvironmentObject, we instantiate and use it as a @StateObject or @ObservedObject and inject it with the modifier environmentObject() of the NavigationView. So it can be shared with the PdfPreviewView.
So, we can modify ContentView as follows:
struct ContentView: View {
    // @EnvironmentObject private var contentViewModel : ContentViewModel
    @StateObject private var contentViewModel = ContentViewModel()
    var body: some View {
        NavigationView {
           ...
           ...
        }
        .environmentObject(contentViewModel)
    }
}
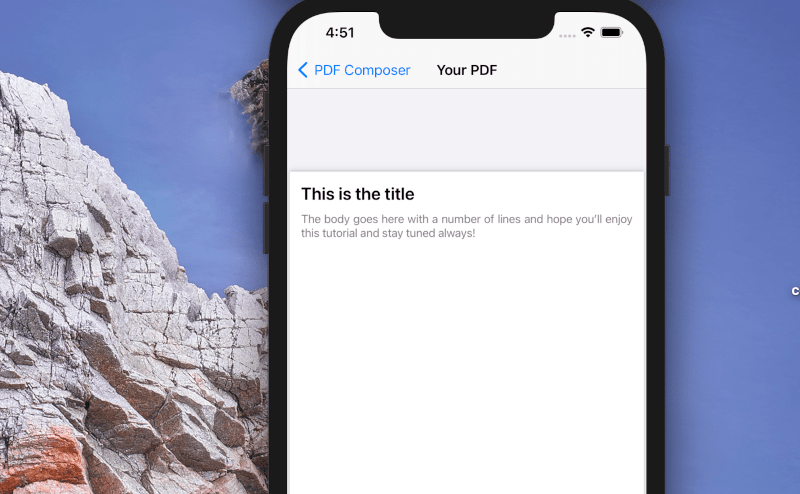
So the result is as follows when run on a device running iOS 14.4.

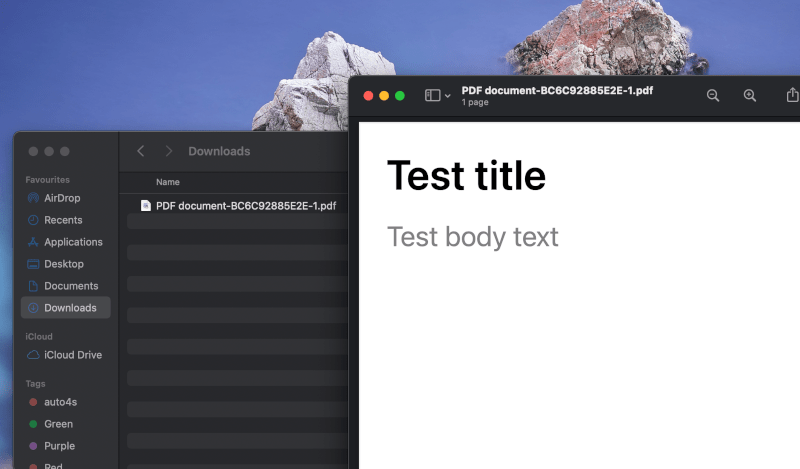
And the PDF document received via Airdrop shared from the app to my new MacBook Air M1 😀 😀 is as below :
That’s all for now. Hope you enjoy this tutorial. The complete source code of this tutorial can be found on GitHub. Happy learning!
How would you handle additional pages if the body height exceeds the height of the page?
Hi Jose,
Thanks for the comments. Btw, the body height should not exceed the page height as the look at the addBody(body:) method in PdfCreator, the body height is given a height with pageRect.height – 80, so when the body text is longer than that it’ll be truncated.
Anyway, this is just an example, a tutorial on how to use PdfKit in SwiftUI and do it in the MVVM way, and for the simplicity the PdfCreator class in this tutorial is able to create one page of PDF only.
If you want to add additional pages then there would be a work around to check the height of the texts in the body by its font size and paragraph style etc. And if it exceeds the page height, then it should split the body text and call context.beginPage() to create a new page and add the remaining lines of text to next page etc.