In our previous post, we showed you how to build an Image Picker with the SwiftUI. Let’s continue on how to build a simple image filter that allows you to use CoreImage filter to add any image effect to a selected image from the image picker.
In the first section of the post, we’ll explore the process of creating a dynamic and user-friendly filter selection view within SwiftUI. Our goal is to construct a horizontal scroll view presenting several common Core Image filters, empowering users to tap on their desired filter for image processing.
The second section, we’ll look at how we combine the Image picker in the previous post, so you can pick up any image from the SwiftUI image picker and apply any of the selected filter from the horizontal filter scroll view.
Making Use Of SwiftUI’s Flexibility:
SwiftUI’s versatility allows us to create interactive components seamlessly integrated into our app’s UI. By leveraging SwiftUI’s robust set of tools, we’ll design a scrollable interface that elegantly showcases various Core Image filters, making the image editing experience intuitive and accessible.
Selecting Common Core Image Filters:
We’ll curate a selection of 7 widely used Core Image filters, just to name a few here, such as Sepia, Black and White, Vignette and Chrome etc. These filters will be presented as interactive elements within our horizontal scroll view, enabling users to easily explore and apply them to images.
Creating an Engaging User Experience:
The scrollable layout will facilitate effortless navigation through the filter options, allowing users to tap on a specific filter to preview its effect or apply it directly to an image. Our aim is to offer an intuitive and visually appealing experience for users interacting with the filter selection interface.
Implementing the Horizontal ScrollView:
First of all we need to build a horizontal scrollview that contains multiple instances of FilterView. The implementation of FilterView is straightforward, as demonstrated below. It primarily presents a text view showcasing the name of the image filter.
struct FilterView: View {
    let filter: FilterOption // Assuming FilterOption is a struct or enum containing filter information

    var body: some View {
        VStack {
            Text(filter.name)
            .font(.headline)
            .foregroundColor(.white)
            .background(Color.clear)
        }
    }
}
The Horizontal Image Filter ScrollView
In SwiftUI, the ScrollView view allows us to display content that extends beyond the screen’s bounds, enabling users to scroll horizontally through a collection of filter options.
To implement the horizontal scroll view for our filter selection, we’ll use the ScrollView with a ScrollViewReader and LazyHGrid. This combination allows us to present a grid-like layout of filter options that can be horizontally scrolled through by the user.
Here’s how we can implement the horizontally scrollable filter selection view:
struct FilterScrollView: View {
    let filterOptions: [FilterOption] = [.sepia,.blackAndWhite,.vignette,
    .chrome,.fade,.tone,.transfer]

    let inputImage: UIImage // The UIImage to be filtered

    var filteredImageHandler: ((UIImage) -> Void)? // Closure to handle the filtered image

    @State private var selectedFilter: FilterOption?


    var body: some View {
        ScrollView(.horizontal, showsIndicators: false) {
            LazyHGrid(rows: [GridItem()]) {
                ForEach(filterOptions, id: \.self) { filter in
                    FilterView(filter: filter)
                        .frame(width: 120, height: 120)
                        .padding(4)
                        .background(selectedFilter == filter ? Color.black : Color.brown)
                        .cornerRadius(4)
                        .onTapGesture {
                            // Action when filter is tapped
                            selectedFilter = filter
                            if let filteredImage = applyFilter(filter, to: inputImage) {
                                // Pass the filtered image to the handler closure
                                filteredImageHandler?(filteredImage)
                            }
                        }
                }
            }
            .padding(.horizontal, 16)
        }
    }
}
Explanation of the code above:
ScrollViewReader allows us to read the scroll view’s content and manage scrolling programmatically. ScrollView sets up a horizontal scroll view, hiding the scroll indicators for a cleaner interface.
LazyHGrid arranges views in a grid-like layout that can adapt to the available space horizontally. Inside the LazyHGrid, we use ForEach to loop through the filterOptions array, creating a FilterView for each filter.
FilterView represents each filter option, and when tapped (onTapGesture), the applyFilter function is called with the selected filter.
let inputImage: UIImage The inputImage property within the FilterScrollView struct represents the initial image that will undergo filtering. This UIImage serves as the source image for applying various filters within the FilterScrollView.
By passing this image as a parameter, the filtering functionality is enabled, allowing users to select different filters and see the applied effects on this image.
var filteredImageHandler: ((UIImage) -> Void)? The filteredImageHandler property within the FilterScrollView struct is a closure that can be assigned to handle the filtered image once the filtering process is completed.
This closure takes a UIImage as an argument, allowing the filtered image to be passed back to the parent or another view for further processing or display.
By providing a closure for handling the filtered image, the FilterScrollView can communicate the results of the filtering operation to other parts of the app, ensuring seamless integration of the filtered image into the UI or application logic.
The @State variable selectedFilter is used to keep track of the currently selected filter. When a FilterView is tapped, its background color will change to black (Color.black) if it matches the selectedFilter, otherwise, it will be set to brown (Color.brown).
The selectedFilter is updated whenever a filter is tapped, indicating the currently selected filter and updating the UI accordingly. Adjust the colors or appearance to fit your design preferences.
FilterOption: Please note that FilterOption is just an enum that represents the filter type as follows:
enum FilterOption: String, CaseIterable {
    case sepia = "Sepia"
    case blackAndWhite = "B&W"
    case vignette = "Vignette"
    case chrome = "Chrome"
    case fade = "Fade"
    case tone = "Tone"
    case transfer = "Transfer"

    var name: String {
        return self.rawValue
    }
}
Ensuring Smooth User Experience:
The use of LazyHGrid ensures efficiency by only creating views as needed, providing a smooth scrolling experience even with a large number of filter options.
By leveraging this approach, we can create a visually appealing and easily navigable horizontal scroll view for selecting Core Image filters within SwiftUI.
The applyFilter function. We have an extension of FilterScrollView which has the applyFilter function as follows:
extension FilterScrollView {
    // Function to apply Core Image filter based on selected FilterOption
    func applyFilter(_ filterOption: FilterOption, to inputImage: UIImage) -> UIImage? {
        let context = CIContext()
        guard let ciImage = CIImage(image: inputImage) else { return nil }

        let filter: CIFilter
        switch filterOption {
            case .sepia:
                filter = CIFilter(name: "CISepiaTone")!
            case .blackAndWhite:
                filter = CIFilter(name: "CIColorMonochrome")!
  // addtional parameters for the fix for the real black and white
                filter.setValue(CIColor(red: 0.6, green: 0.6, blue: 0.6), forKey: kCIInputColorKey) // Set to black
                filter.setValue(1.0, forKey: kCIInputIntensityKey) // Full intensity for black-and-white
            case .vignette:
                filter = CIFilter(name: "CIVignette")!
            case .chrome:
                filter = CIFilter(name: "CIPhotoEffectChrome")!
            case .fade:
                filter = CIFilter(name: "CIPhotoEffectFade")!
            case .tone:
                filter = CIFilter(name: "CIPhotoEffectTonal")!
            case .transfer:
                filter = CIFilter(name: "CIPhotoEffectTransfer")!
        }

        filter.setValue(ciImage, forKey: kCIInputImageKey)

        if let outputCIImage = filter.outputImage,
           let outputCGImage = context.createCGImage(outputCIImage, from: outputCIImage.extent) {
            return UIImage(cgImage: outputCGImage)
        } else {
            return nil
        }
    }
}
Please note we also need to import CoreImage in file of struct FilterScrollView
import SwiftUI
import CoreImage
import CoreImage.CIFilterBuiltins
.
.
struct FilterScrollView: View {
.
.
.
}
Explanation of the above applyFilter function:
This function applyFilter takes a FilterOption and an input UIImage.
It initializes a CIContext and converts the input UIImage to a CIImage.
A switch statement is used to select the appropriate Core Image filter based on the chosen FilterOption. For each filter case (e.g., .sepia, .blackAndWhite), a corresponding CIFilter is created and configured with the input image.
The function applies the selected filter to the input image and returns the filtered output as a UIImage
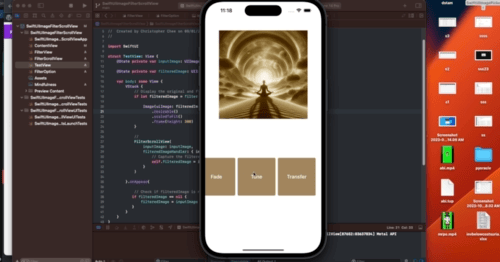
Create a TestView to preview the functionality of our FilterScrollView
Let’s set up a simple TestView to examine the behavior of our FilterScrollView. This view consists of a VStack structure that positions an Image view at the top, displaying a static image sourced from the asset library. Beneath it resides the FilterScrollView.
The Image view’s purpose is to showcase the filtered image. Upon the VStack’s appearance, the filtered image is assigned the input image during the onAppear event. This action ensures that if the filtered image is not yet initialized, it defaults to displaying the input image.
import SwiftUI
struct TestView: View {
    @State private var inputImage: UIImage = UIImage(named: "Mindfulness.jpeg")!

    @State private var filteredImage: UIImage?

    var body: some View {
        VStack {
            // Display the original and filtered images
            if let filteredImage = filteredImage {
                Image(uiImage: filteredImage)
                    .resizable()
                    .scaledToFit()
                    .frame(height: 300)
            }
            // The Filter Horizontal Scroll View
            FilterScrollView(
                inputImage: inputImage,
                filteredImageHandler: { image in
                    // Capture the filtered image and update the UI
                    self.filteredImage = image
                }
            )

        }.onAppear{
            // Check if filteredImage is nil and assign inputImage to it
           if filteredImage == nil {
               filteredImage = inputImage
           }
        }
    }
}
When run on the iOS simulator, the below animated GIF shows how it works:
Section 2 : Making it complete with an Image Picker
So, now we borrow some code in our previous tutorial the Image Picker, so you can pick up any image from the Photo Library and apply with the selected filter from the Horizontal Image Filter ScrollView.
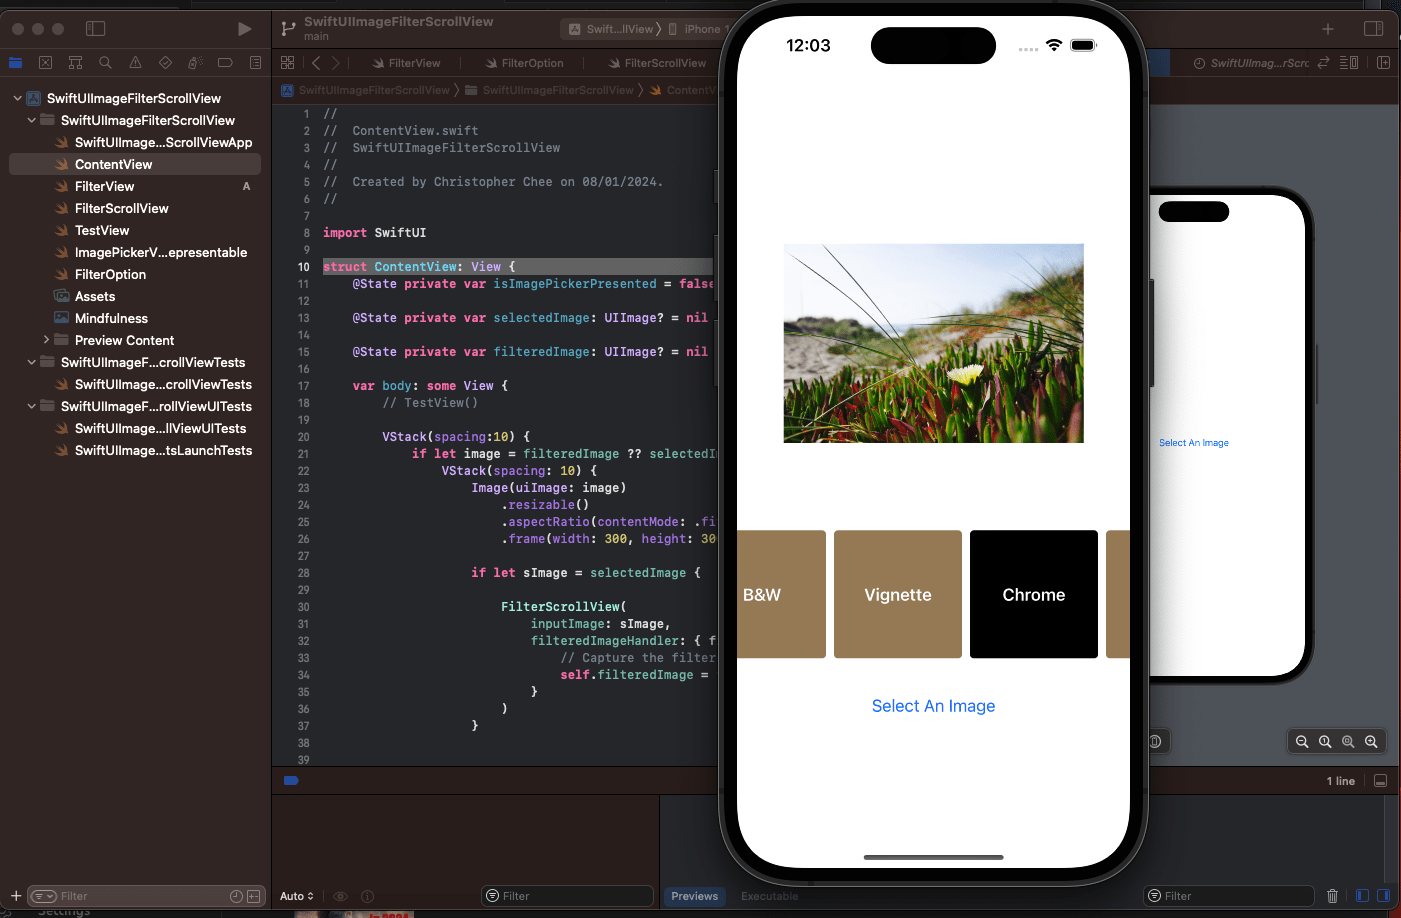
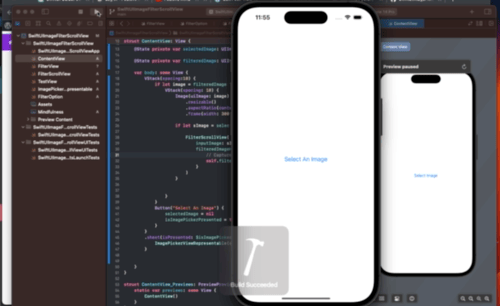
We have a ContentView as below which is integrated with the Image Picker.
struct ContentView: View {
    @State private var isImagePickerPresented = false
    @State private var selectedImage: UIImage? = nil
    @State private var filteredImage: UIImage? = nil

    var body: some View {
        VStack(spacing:10) {
            if let image = filteredImage ?? selectedImage {
                VStack(spacing: 10) {
                    Image(uiImage: image)
                        .resizable()
                        .aspectRatio(contentMode: .fit)
                        .frame(width: 300, height: 300)

                    if let sImage = selectedImage {
                        FilterScrollView(
                            inputImage: sImage,
                            filteredImageHandler: { filteredImage in
                                // Capture the filtered image and update the UI
                                self.filteredImage = filteredImage
                            }
                        )
                    }
                }
            }
            Button("Select An Image") {
                isImagePickerPresented = true
                // set all images to nil
                selectedImage = nil
                filteredImage = nil
            }
        }
        .sheet(isPresented: $isImagePickerPresented) {
            ImagePickerViewRepresentable(selectedImage: $selectedImage)
        }


    }
}
Explanation of the above ContentView
@State variables are used to handle the app’s state changes internally within the view.
isImagePickerPresented controls the presentation of the image picker.
selectedImage holds the image selected by the user using the image picker. Refer here for the Image Picker post.
filteredImage retains the filtered version of the selected image.
The VStack sets up the layout of the view, containing an Image and a button.
The Image displays the filteredImage if available; otherwise, it displays the selectedImage.
The Button triggers the presentation of the image picker (ImagePickerViewRepresentable).
Inside the conditional block, if an image is selected, it displays the FilterScrollView with the selectedImage. When the user applies a filter within FilterScrollView, the filteredImageHandler updates the filteredImage variable, which refreshes the UI to display the filtered result.
This design ensures that the image picker is shown when the “Select An Image” button is tapped. It also allows users to select an image, apply filters to the selected image via FilterScrollView, and view the filtered result in the Image display area.
The animated GIF below shows how it works on an iOS simulator.
That’s all for now. Hope you enjoy this tutorial. The complete source code of this tutorial can be found on GitHub. Happy learning!