In UIKit, we use UITableView to display a single-column, vertical and scrollable rows of contents and UIScrollView to display contents that will not fit entirely on the screen, which then allows them to be scrollable either horizontally and vertically.
If you’re familiar with UIKit, you’d know that it’s not that straightforward to implement a UITableView or a UIScrollView.
In UITableView, to display rows of contents, you need to implement a number of methods in UITableViewDataSource, first of all, the cellForRowAtIndexPath method to return the UITableViewCell that lays out the contents or views.
In a UITableView, if you need mixing rows or some sections of rows displaying different layouts of contents, then your code will need to check row or section of the IndexPath and return the different types of UITableViewCell accordingly. It sounds troublesome! Dosen’t it?
Lets put aside how troublesome to implement a UITableView and look at how easy it is to work with a List view in SwiftUI. To display a vertical, single column list of items for SwiftUI, is just as below, e.g. to show a vertical list of Text views:
List {
   Text("Row one")
   Text("Row two")
   Text("Row three")
   Text("Row four")
   Text("Row five")
}
The result on the Xcode SwiftUI preview is just as below:

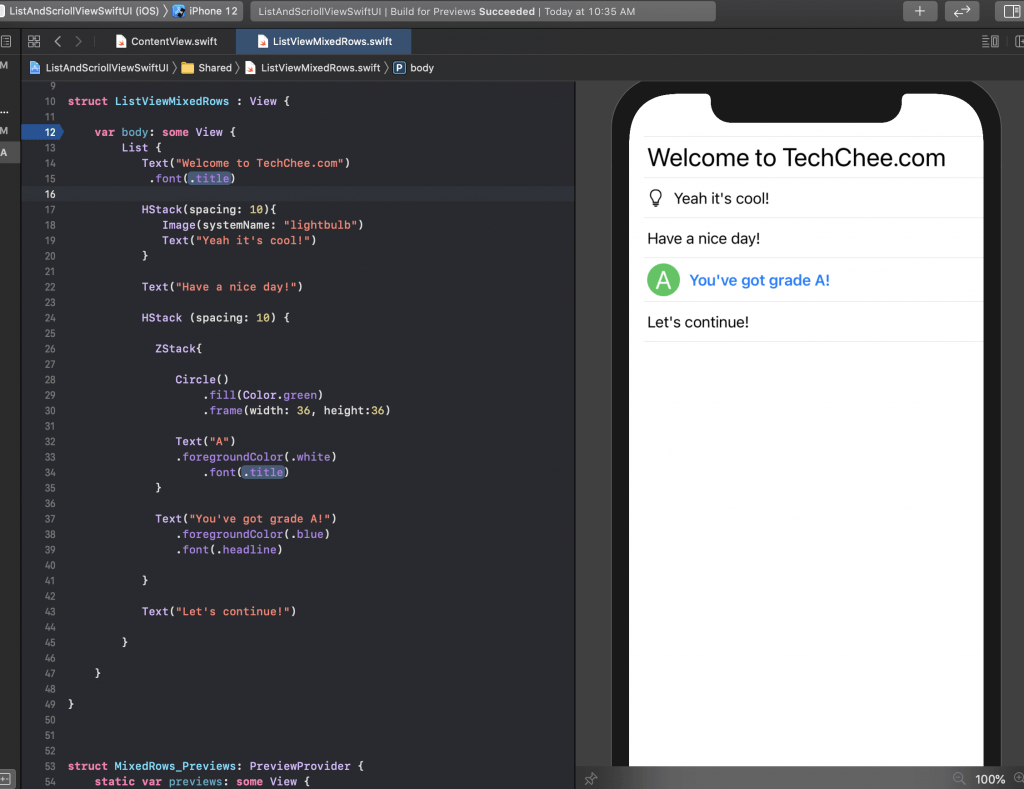
To mix different rows displaying different layouts of views are just as followings:
List{
    Text("Welcome to TechChee.com")
    .font(.title) // 1st row

    HStack(spacing: 10){
       Image(systemName: "lightbulb")
       Text("Yeah it's cool!")
    } // 2nd row

    Text("Have a nice day!") // 3rd row

    HStack (spacing: 10) {
       ZStack{
          Circle().fill(Color.green)
          .frame(width: 36, height:36)

          Text("A")
          .foregroundColor(.white)
          .font(.title)
       }

       Text("You've got grade A!")
       .foregroundColor(.blue)
       .font(.headline)
    } // 4th row

    Text("Let's continue!") // 5th row
}
The above has a Text view for row 1, an HStack contains an Image view and Text view for row 2, a text view for row 3, an HStack contains a ZStack and a Text view and finally the 5th row is a Text view. The result in Xcode previews is shown below:
Now, let’s look at ScrollView. In UIKit, programmatically adding subviews (e.g. UIImageView) to a UIScrollView will need you to set the constraints or frame of each subview and then set the content size of the UIScrollView etc.
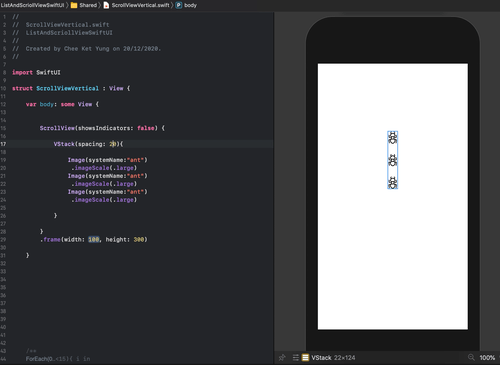
Working with ScrollView is relatively easy in SwiftUI. ScrollView is vertical by default, views can be added to ScrollView as below.
ScrollView {
   VStack(spacing:20){

      Image(systemName:"ant")
      .imageScale(.large)
      Image(systemName:"ant")
      .imageScale(.large)
      Image(systemName:"ant")
      .imageScale(.large)

   }
}
The above code simply adds 3 Images with SF Symbol to the scrollview and a VStack is used to add spacing in between them.
Please note that each Image view automatically sizes itself to fit the container and adds extra insets to avoid the safe area. The result is shown below:
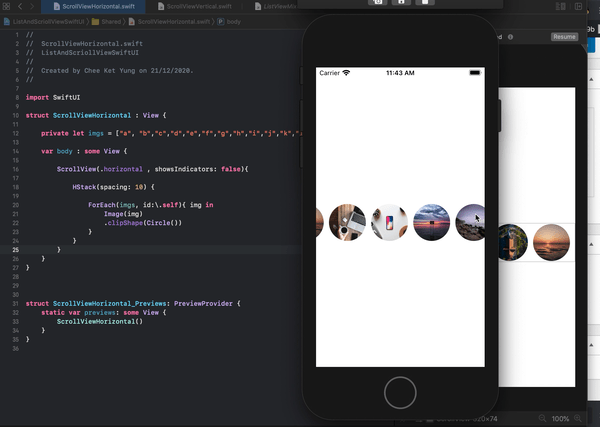
To have a horizontal ScrollView, you’ll need to add .horizontal as the example below :
let imgs = ["a", "b","c","d","e","f","g","h","i","j","k","l","m","n","o"]
ScrollView(.horizontal , showsIndicators: false){
   HStack(spacing: 10) {

     ForEach(imgs, id:\.self){ img in
        Image(img)
        .clipShape(Circle()) // Make the image view clip to a circle shape
     }
   }
}
In the above code, ForEach is used to loop over an array of String, which each element is the image name of the images stored in your assets and create the Image view. HStack is used here to lay out the Image views horizontally. The result is shown below:
The complete source code of this tutorial can be found on GitHub